
- > Epic PvP Gear Will Not Be Upgradeable in Mists of Pandaria Classic
- > Stormstout Brewery MOP Classic Dungeon Guide – Walkthrough, Tips & Loot
- > How the MoP Cooking System Works in Classic – Fast, Fun & Surprisingly Profitable
- > World of Warcraft: Season of Discovery Ends With a Bang—No Phase 9, But Surprises Await
- > Top 10 Tips for Beginners in Mists of Pandaria Classic
- > Massive MoP Classic Phase 3 Patch 5.5.3 Notes: New Zones, Challenges, Dungeons, and More
Shado‑Pan Monastery MOP Classic Dungeon Guide – Walkthrough & Loot
Guarded by the elite Shado-Pan monks and deep in Kun-Lai Summit, Shado‑Pan Monastery is corrupted by the Sha’s influence, requiring a precise mix of awareness, positioning, and coordination to cleanse. Available from level 87, you’ll face four escalating encounters, each with unique mechanics and high-reward loot. Ideal for gearing, quest completion, and challenge-mode speedrunning.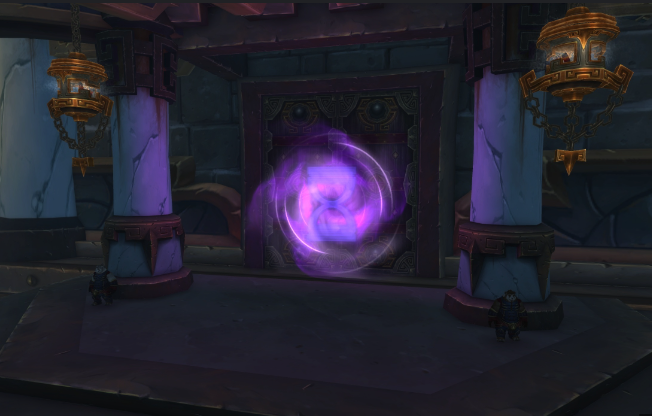
Dungeon Layout & Trash Overview
The path is linear across four main zones: the entrance courtyard, Cloudstrike’s dojo, Snowdrift’s lessons, and the Sha-guarded halls leading to Taran Zhu.
-
Trash mobs: corrupted monks and Sha-infused Shado-Pan. Prioritize interrupts, position-away-from-group, and avoid environmental hazards.
-
Tanks should pull strategically to reduce overlap; healers must be ready for AoE spikes; DPS focus interrupts and pack control.
Challenge Mode skip: After Master Snowdrift, you can use Goblin Gliders or invis potions to bypass Sha mobs in the hallway.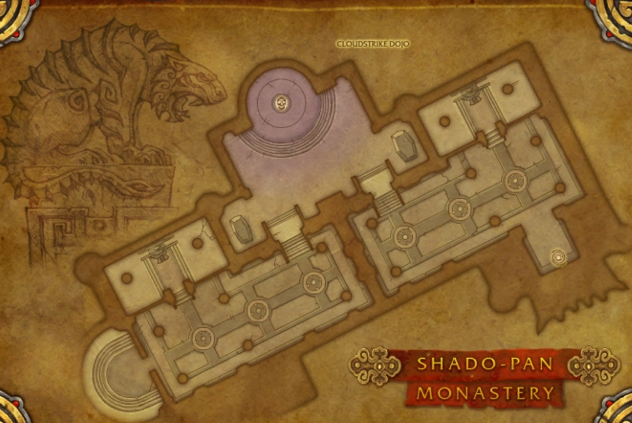
Boss 1 – Gu Cloudstrike
A three-phase fight with lightning and nature mechanics:
Phase 1: Gu uses Invoke Lightning (chains) and Static Field (AoE zone). Spread out and interrupt.
Phase 2 (50% HP): Summons Azure Serpent. Gu becomes immune; kill the serpent quickly to resume. Serpent casts Lightning Breath and Magnetic Shroud—healers must out-heal the shield to burst it.
Phase 3: Return to fight both; continue spreading, interrupting, and managing cooldowns.
Tips: Tanks position the serpent away, melee stack behind Gu. Be ready with AoE healing and dispels.
Boss 2 – Master Snowdrift & Novices
This encounter tests awareness and timing:
-
Waves of Shado‑Pan Novices + masters spawn; handle with kiting and interrupts.
-
Achievement Respect (on Heroic): defeat novices and masters in correct order to make novices bow.
-
Master Snowdrift phases: uses Flying Snow fixates and ranged AoE; Fragrant Lotus buffs and ranged damage. Deal with Novices first, then burst masters while avoiding heavy AoE.
Tips: Spread out to minimize AoE, temp-stack when needed. Tanks use mobility cooldowns and group positioning.
Boss 3 – Sha of Violence
A chaotic fight where Sha adds near-death will cast a lethal uninterruptible spell (~10% HP).
-
Sha adds: interrupting is vital; they can one-shot the party if the spell succeeds.
-
Phase mechanics: multiple Sha figures spawn; keep add count low by interrupting and burst-DPS them before death triggers happen.
-
Healers: Watch for unpredictable AoE and burst heals.
Strategy: Communicate interrupts, spread to reduce AoE stacking, and assign specific interrupt roles (e.g., Warriors with spell reflect on Amber Shapers).
Boss 4 – Taran Zhu
Final encounter with a signature Hate mechanic:
-
Phase 1: Taran Zhu builds hatred stacks from ranged attacks. Tanks/healers should manage threat and stack cleansing as needed.
-
Phase 2: At high hatred, Zhu meditates and resets before engaging phase two attacks.
-
Abilities: cleaves, crowd-control AoE, and moderate burst. The Agony achievement (“Hate Leads to Suffering”) requires everyone to reach maximum hatred at kill.
Tips: Tanks face Zhu properly, healers keep cleansing or mitigating hatred buildup, and DPS assist with cleanse or healing when possible.
Loot Table & Quests
Shado-Pan Monastery drops gear ideal for all roles at level 435 (Normal) to 463 (Heroic):
-
Gu Cloudstrike: Leggings of the Charging Soul (Agility/Intellect)
-
Master Snowdrift: Quivering Heart Girdle (plate belt)
-
Sha of Violence: Gloves of Enraged Slaughter (cloth) with bonus malign effects
-
Taran Zhu: Blastwalker Footguards (mail), Shadowspine Shoulderguards (mail), plus various chest, trinkets, and weapons.
Quests include “Into the Monastery” and “Lord of the Shado‑Pan”.
Achievements & Challenge Mode Strategy
-
Respect: Bow when novices bow—timed kills under Master Snowdrift.
-
The Obvious Solution: Defeat Sha of Violence after clearing sealed chambers (heroic).
-
Hate Leads to Suffering: Everyone must reach max hatred before Taran Zhu’s death.
-
Challenge Mode (Gold ~21 min): Skip trash via glider route, use invis pots, group cooldowns on Gu Cloudstrike and Taran Zhu.
Role-Specific Tips
Tanks
-
Pre-pull cooldown on trash and bosses.
-
Kite the serpent and position add-heavy pulls away from the group.
-
Manage hatred stacks in phase one of Zhu.
Healers
-
AoE spam during packed pulls and phases.
-
Heal through Magnetic Shroud on the serpent.
-
Cleanse hatred debuffs, use cooldowns for burst uptime.
DPS
-
Interrupt Sha adds and Lightning Breath casts.
-
Coordinate burst windows (phases and tanks swapping).
-
Use invis/glider in CM.
Challenge Mode & Speedrunning Advice
-
Use gliders and invis potions to bypass Sha packs after Snowdrift.
-
Plan Bloodlust/Heroism before Gu’s phase shift and during Zhu’s first phase.
-
Stack mage/druid speed buffs after Gu to quickly collapse into Sha and final boss.
-
Pre-assign crystal-clickers and cleansers.
Conclusion
Shado‑Pan Monastery combines lightning-fast mechanics, Sha-driven chaos, and boss-by-boss complexity. From Gu’s multi-phase grind to Zhu’s hatred stacks, mastery comes from preparation, coordination, and targeted interrupts. Use this guide to streamline trash pulls, optimize cooldown usage, unlock achievements, and fast-track challenge-mode success. Embrace the challenge, coordinate tightly, and purify the monastery of its Sha corruption. Good luck!
Table of contents
Buy WoW MoP Classic Products
Recommended Article