
- > WoW TBC Classic Anniversary Phase 3 Epic Gems Guide: How to Get Gems & Prepare for Tier 6
- > TBC Classic Anniversary Phase 3 Guide: Black Temple, Mount Hyjal, Attunement & Full Preparation
- > TBC Anniversary vs. 2021 Classic: Why Phase 2 Gearing is 10x Faster in 2026
- > Super Simple Gruul & Magtheridon Raid Guide – TBC Classic Anniversary
- > TBC Anniversary Karazhan Loot & Tier Tokens — Your Best Early Raid Gear Source
- > Why DRUID is the BIS Class in TBC Classic Anniversary – Ultimate Guide
TBC Classic Zul'aman Guide: All You Need To Know
On March 22nd, 2022, the Zul’aman 10-man raid got released. Players have been vying for an opportunity to get their hands on this new content/gear and the Amani War Bear, an epic mount with a 100% drop rate for one member of the raid. Zul’aman is in the Ghostlands and, as of patch 2.3, will be opened for players. How will you handle this new raid content? Well, don’t worry; we will go over each boss, their mechanics, and how you can complete this new raid starting with how to open the doors to Zul’aman.
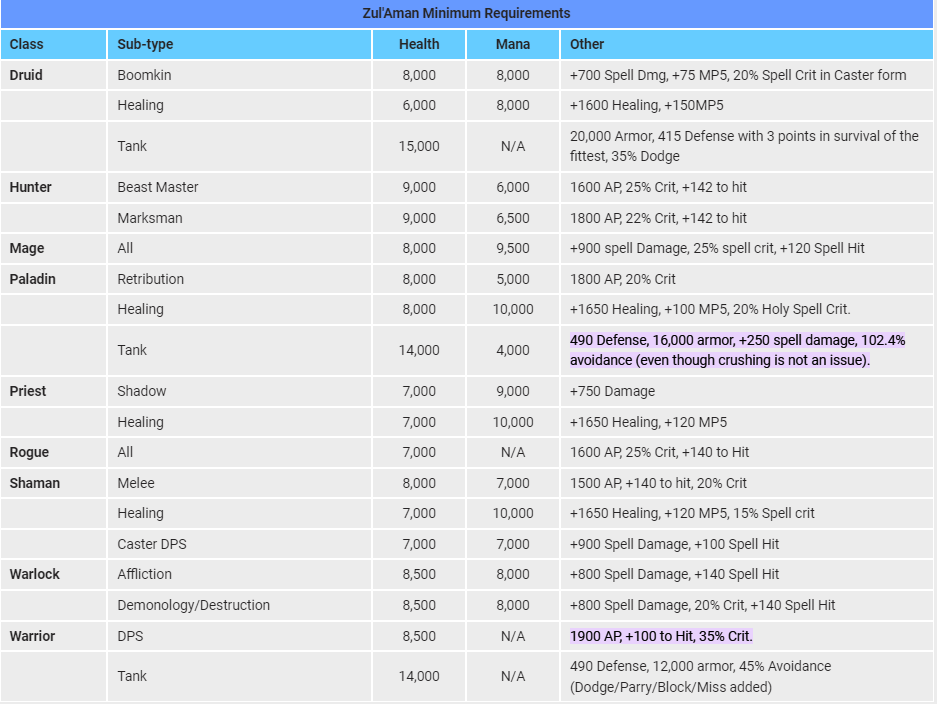
Zul’aman Gear Requirements
The list above is an excellent showcase of what you will be required (minimum) to be able to clear Zul’aman. Follow this list before you even attempt Zul’aman and if you can, get some better WoW TBC Classic Items/gear to avoid wiping.
Zul’aman Bosses
Here is a list of all bosses you will encounter throughout Zul’aman; we will go into greater detail further down this guide:
●The Door - Gauntlet plus Timer Start
●Akil’zon
●Nalorakk
●Jan’alai
●Halazzi
●Hex Lord Malacrass
●Zul’Jin
These bosses all have unique attack phases and will require you to follow this guide to beat them. This raid also has many gauntlets and timers, putting your raid to the test in terms of times for breaks and pulls. So without further ado, let’s get into each of these bosses ( we will also post screenshots of these bosses and the fights to help you better picture each phase)
The Zul’aman Door
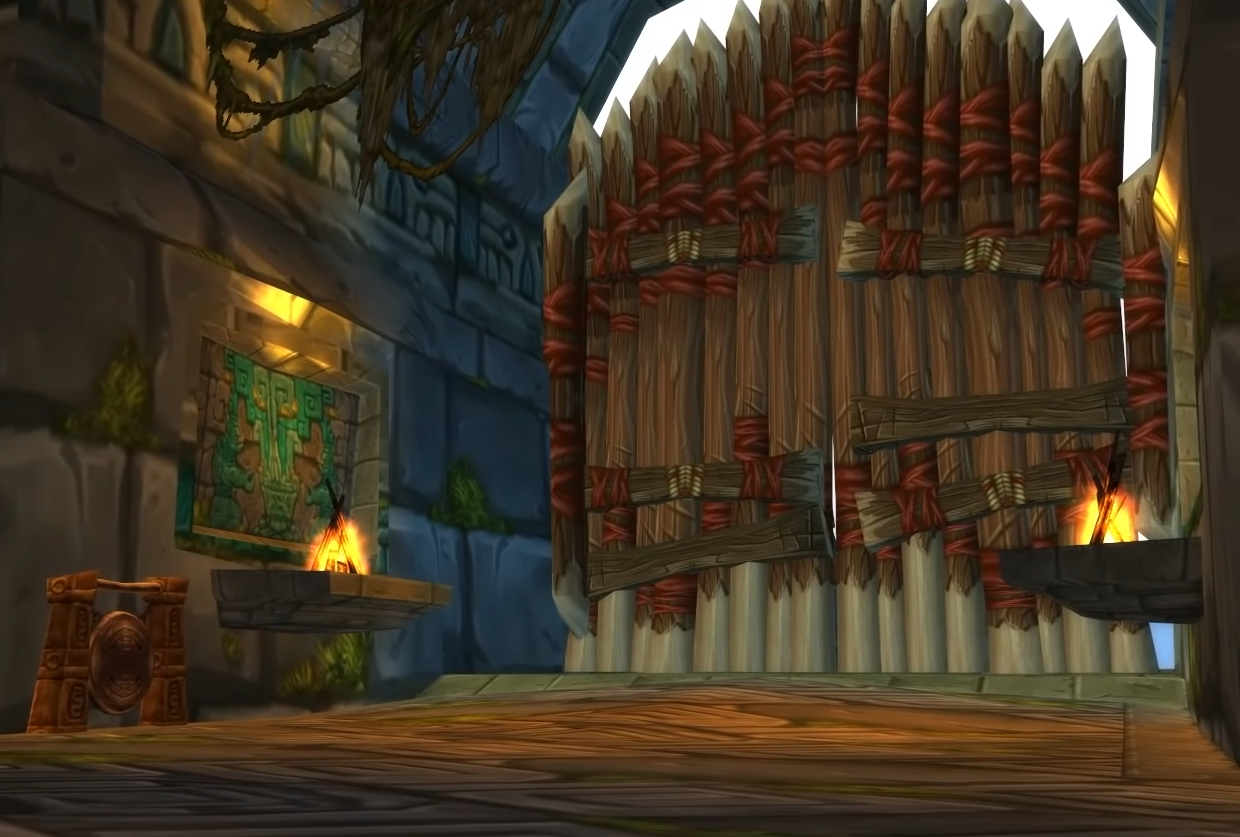
When you enter Zul’aman, you will encounter a door with a gong. For many people, they would think just to hit the gong and open the gates; however, you need to speak to Harrison Jones first and follow these steps:
●Speak to Harrison Jones
●Get five players to stand around the gong
●Have everyone hit the gong at the same time
●Stay Still until Harrison Jones opens the doors.
Once you have opened the gates, a timer will appear at the top. Once those doors open, the race begins and breaks become few and far between (Healers should have mana pots and use weaker spells to keep mana costs low). The timer indicates the loot drop from the fourth boss; once the timer runs out, the loot disappears and can no longer be accessed. Having the loot disappear is quite a problem as this loot is the rare sought-after Amani War Bear that most players join the raid to get (along with various other helpful gear pieces).
You can extend the timer by beating Akil’zon and Nalorakk. Defeating these bosses will allocate ten extra mins for Akil’zon and 15 mins for Nalorakk. This gauntlet is reasonably easy but can easily be lost if you wipe it more than once.
Akil’zon - The Eagle Avatar
Akil’zon is the “first” raid boss you will encounter throughout Zul’aman. Akil’zon has two phases which we will go over in detail below:
Before Akil’zon Fight
Before you reach Akil’zon, you will be swarmed by never-ending eagles (Constantly respawning) and fairly tanky trash mobs. You want to charge up the stairs and pull the Aman’shi Tempest as fast as possible - as soon as your raid does this, the eagles will stop spawning. Once you have cleared this, you can move up the stairs and begin the fight with Akil’zon.
Akil’zon First Phase
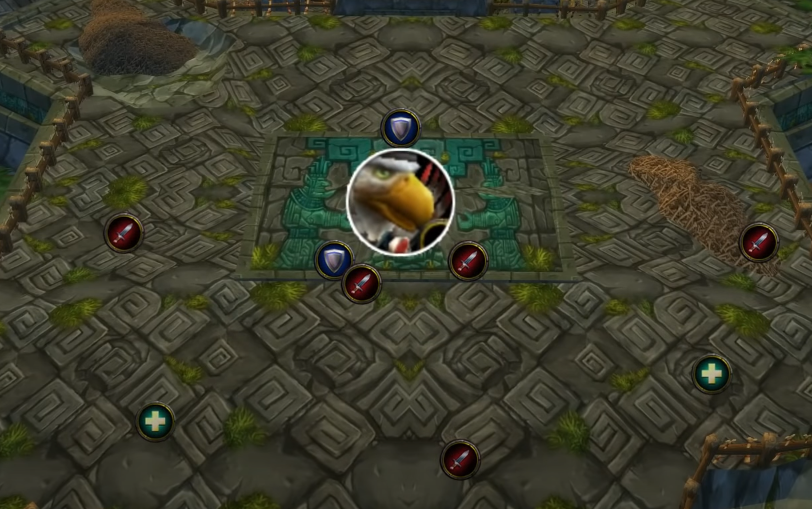
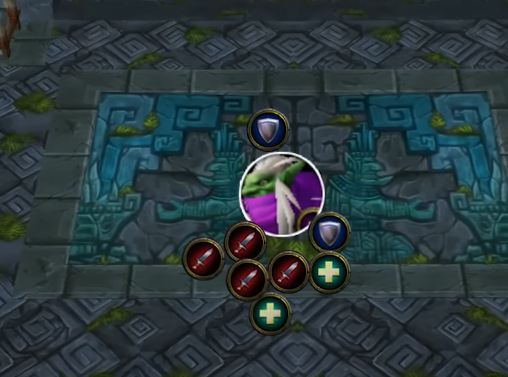
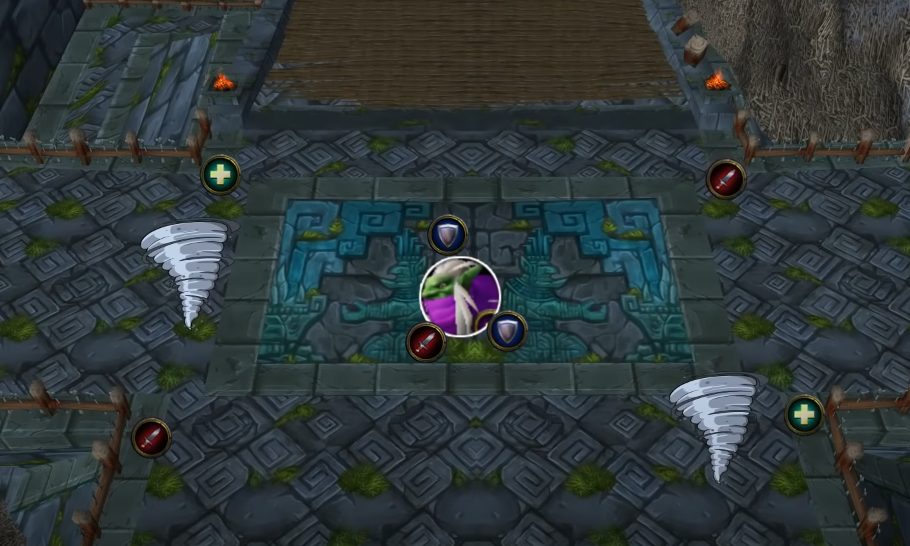
During the first phase of the fight, Akilzon will use two attacks: Static Disruption and a Levitate type ability that throws you in the air. Spread out like the picture above so that Static disruption does not cause raid-wide damage. Static Disruption is randomly cast on party members and hurts anyone around the afflicted target.
The rest of Phase one will just be a tank and spank with an ability that throws a random member of the raid in the air; when this happens, the Healers must keep them topped up as the targeted party member will lose just over half their health.
Phase Two
Once you have beaten the boss down to 50% health, phase two will begin. Phase two requires all party members to huddle around the boss - like in the picture above - as Akil’zon will begin to cast “Electrical Storm.” Electrical Storm throws one random party member in the air and will instantly kill (Basically one-shot) anyone that isn’t underneath the player in the air. Once he has cast this ability, move back to your respective distances to avoid getting hit by Static Disruption.
The last tip, ignore the eagle ads as they do not deal much damage and instead focus all damage on Akil’zon.
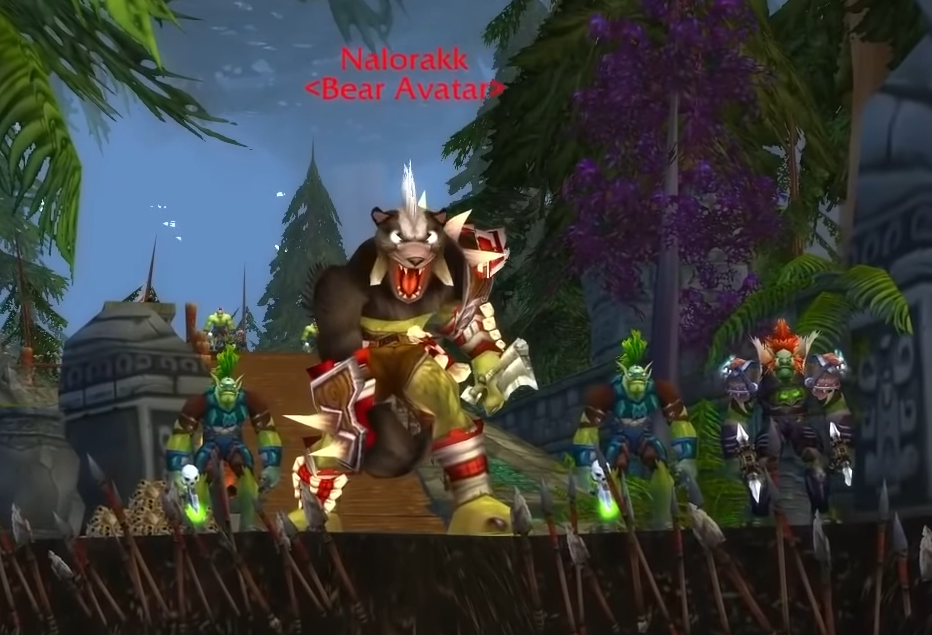
Nalorakk - The Bear Avatar
Nalorakk is elusive. He will run away throughout the fight and send his minions after you and your raid.
Nalorakk Trash Mobs
None of the minions are overly complicated or require special attention except for the Amani Bear Mounts. These Amani Bear Mounts cause 10 000 armor shred and can easily one-shot the tank if they get aggro on both of them. If you’re the tank, you want your off-tank to pull one off of you, and healers must be ready to heal as much as possible over this fight.
Nalorakk Fight
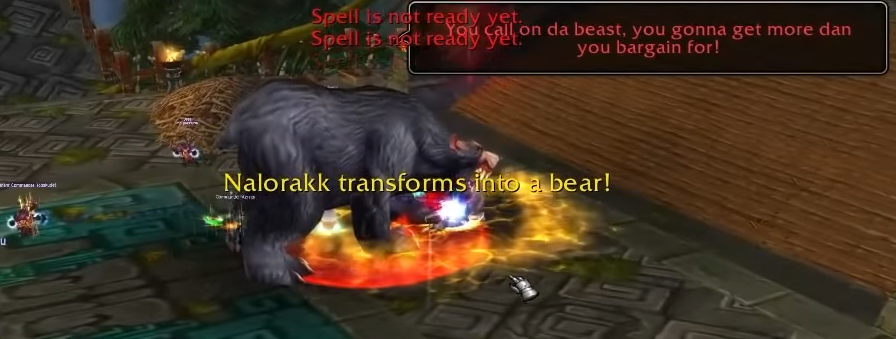
Nalorakk is simple enough; he is a tank-n-spank boss fight we’ve come to love in WoW. Nalorakk turns the main tank into a bear throughout the fight and uses attacks that can one-shot the tank in bear form - This means the off-tank needs to aggro the boss quickly not to let that happen. Otherwise, tanks must face the opposite direction of the raid as Nalorakk does cleave damage to anyone in front of him. A simple gear check boss with easy mechanics - should be easy enough if your raid has minimum requirements.
Jan’alai - The Dragonhawk Avatar
Before Jan’alai Fight
None of the mobs before the Jan’alai fight are worthy of mention other than the Amani Scout. He can sound the gong that summons two elites with 60k HP. These elites may not be difficult to beat but waste precious time needed for your timed chest. So do not let the scout get away and burst him down (use CC).
By the way, if you want to loot cloth from mobs so you can do Tailoring in-game, please check our WoW TBC Classic Enchanting Guide.
Jan’alai Fight - Phase One
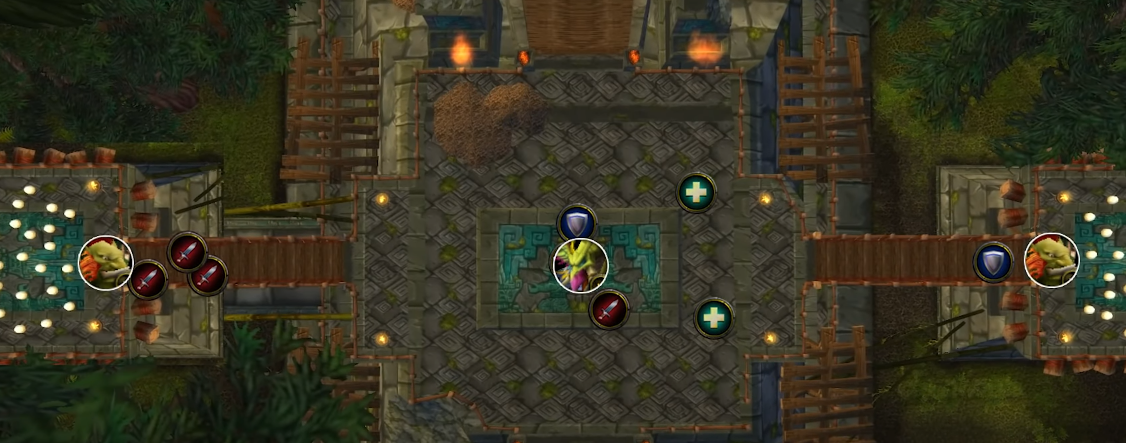
For this encounter, your raid must be in a circle around Jan’alai. The reason for spreading in a circle is to avoid the entire raid being hit by Flame Breath, an ability that gets randomly used on a raid member. If anyone is near the target, all party members will be hit, and massive damage will ensue.
Throughout the boss fight, two Amani egg hatches will spawn and kill the one on the left (as seen in the picture above) while a tank takes aggro on the right. The Amani egg hatcher on the right will run over to the left side to hatch the eggs there (since you killed the one on the left), but you must stop him before he gets there. You should be nuking down any dragons that spawned; if all goes well, phase two will begin.
Jan’alai Fight - Phase Two
Jan’alai will periodically spam flame circles on the ground; those circles will explode after some time; you want to avoid those circles as quickly as possible. Other than that, keep fighting the boss till he goes down, and that should be Jan’alai completed.
Halazzi - The Lynx Avatar
Before Halazzi Fight
The Mobs before Halazzi are nothing worth mentioning; however, they can be avoided if you don’t pull the patrols. Also, be careful not to pull the crocodiles in the river - they are neutral but may get aggroed if you use AoE spells.
Halazzi - Phase One
Before we get into each phase, let’s go over what each phase represents here:
1.75%
2.50%
3.25%
Once Halazzi reaches either of those health percentages, he will immediately get to 100% health again and summon a lynx. If your tanks are geared enough, you can ignore the lynx for the most part.
So, the first phase:
The boss will cast Frenzy and Saber Lash. Hunters can use Tranquil shot to negate Frenzy, and Saber lash acts as a shared health damage between both tanks. In other words, each tank needs to take the aggro off of one another during this phase.
Phase Two Halazzi
Spirit Form. Once this spirit is initiated, everyone in the raid will take 4k damage immediately. Healers must top up the raid as fast as possible. At this stage, he will also summon a Lightning totem. This totem cannot be ignored and must be destroyed as quickly as possible.
Phase Three Halazzi
Nuke Halazzi down as fast as possible. He will enrage and use totems from phase two-plus abilities from phase one in this phase. Once you have nuked him down from here, he will be eliminated. You may also receive the timed loot chest containing the Amani War Bear if you've done all the fights within the time limit. No more need to rush!
Hex Lord Malacrass
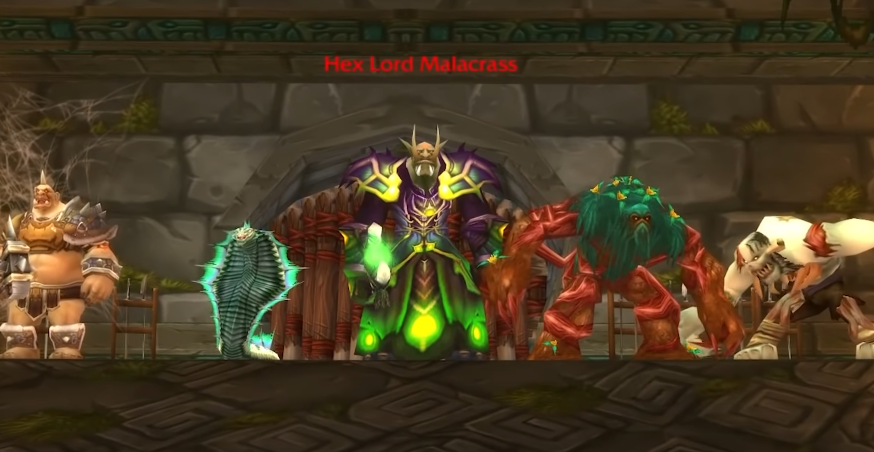
Hex Lord Malacrass - aka the RNG boss of Zul’aman. He may spawn with a different variety of mobs by his side per lock-out.
Fighting Hex Lord Malacrass
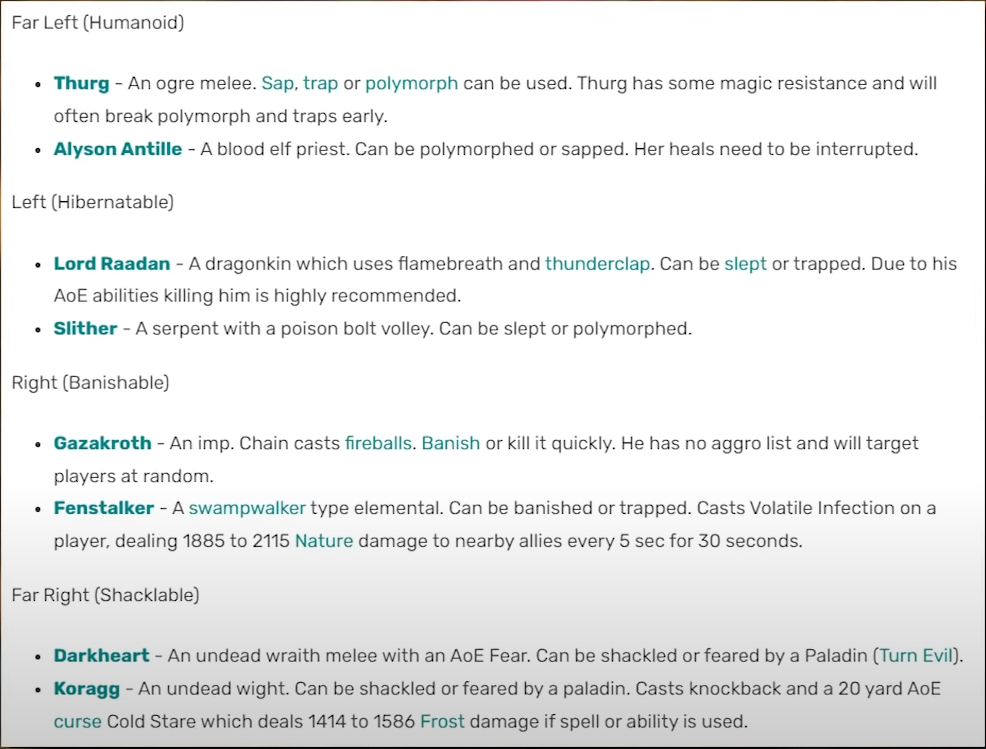
This fight is possibly the easiest or hardest fight in the raid. Due to the randomness of this encounter, certain mobs can be cc’d by abilities, and others cannot. What we’d recommend is looking at this list and seeing if you want to go the CC route:
If you don’t want to use the CC route and instead feel your raid has enough gear, pull all the mobs on top of Hex Lord Malacrass and AoE everything down. It’s as simple as that, nuke and AoE down everything in that room.
As for Hex Lord Malacrass, he has two major abilities that he uses:
Spirit Bolts
Siphon Soul
Spirit Bolts does AoE raid-wide damage and is essentially a heal check; use potions and soulstones to help out your healers.
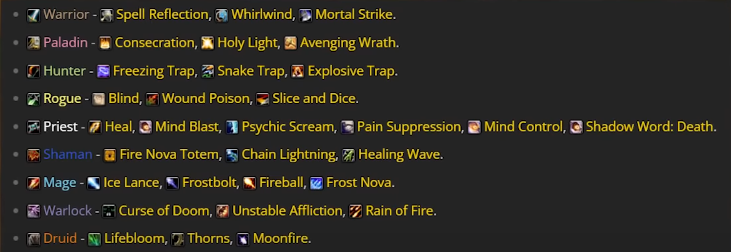
Siphon Soul takes a random class of abilities from a party member in the raid; you can see a list down here of those abilities:
Other than that, he is relatively simple and is primarily a healer check.
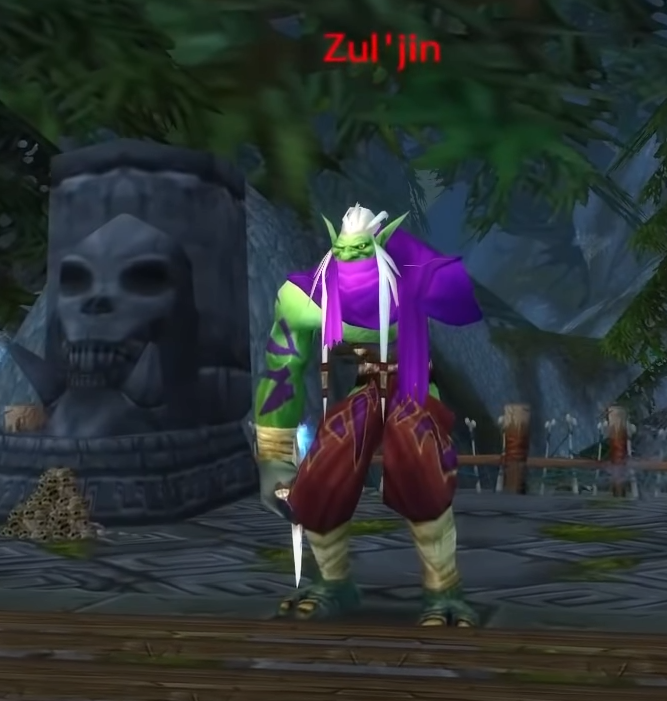
Zul’jin - The Final Boss
Before the Fight
There will be a lot of mobs that run at you before the Zul’jin Fight, there may be many of them, but they are quickly taken down with AoE.
Zul’jin - The Fight
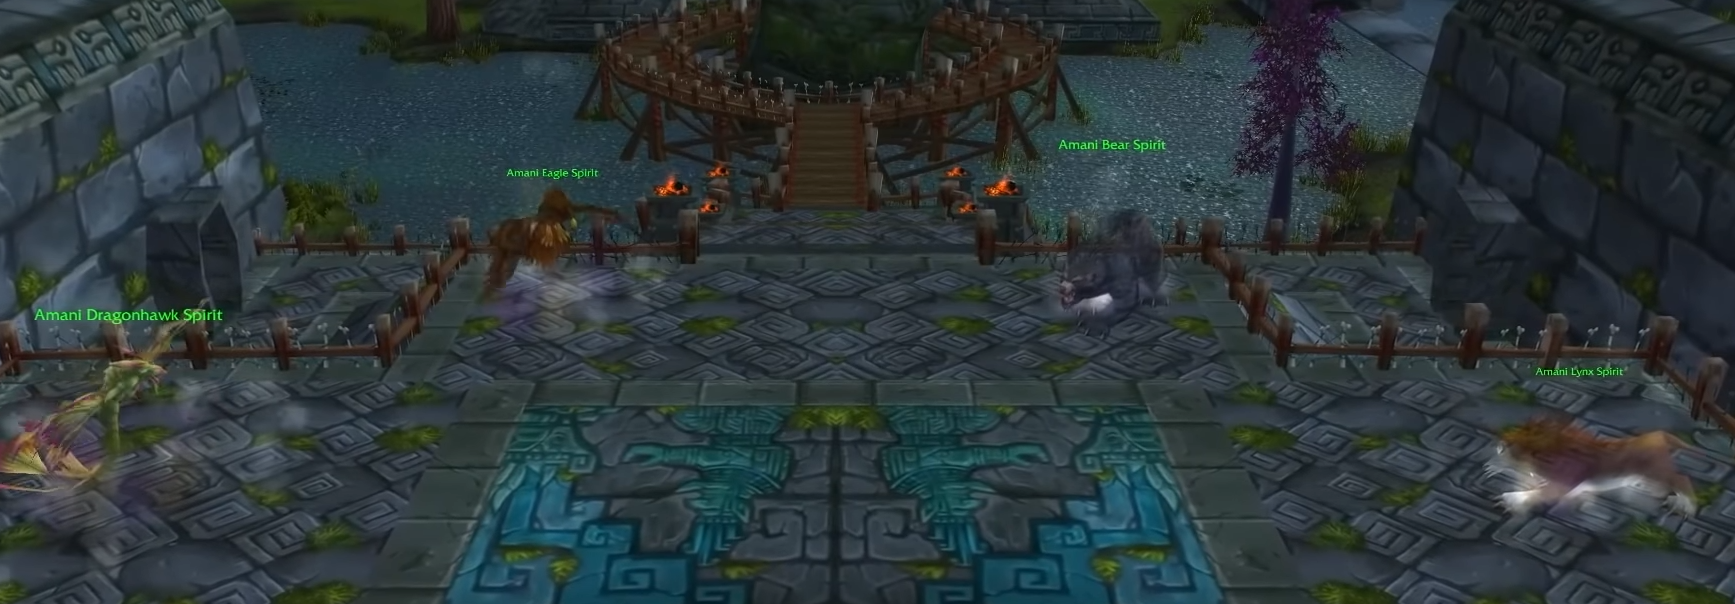
Zul’jin has five phases, which sounds intimidating, but we will go through each step by step to help you clear this fight. Each of the phases is represented by the previous bosses' avatar’s seen below:
Each of the phases gets activated on % of health the boss has. 80% spawns the bear, 60% is the Eagle, etc. When the boss changes phases, the tank will lose aggro so remember to wait until your main tank has gotten aggro back before casting abilities.
So without further ado, let’s get into the phases.
Phase One - Regular Form
As the title suggests, he is in his regular troll form. He has two abilities that you need to be careful from:
1.Whirlwind
2.Grievous Throw
Whirlwind is simple; the damage only goes off at the end of the whirlwind charge - at that point, each melee must run away from him to avoid fatal damage.
Grievous Throw is a debuff that randomly gets assigned to a raid member - to clear this; debuff healers must heal the afflicted target to 100%.
Phase Two - Bear Form
After waiting for the tank to gain aggro, you will lay down DPS. The Bear form will cast Creeping Paralysis on the raid and stun everyone afflicted by it unless they get dispelled. An excellent suggestion is to have your healers and everyone else go behind the boss for mass dispelling. - As seen below:
Other than that, just keep nuking him down till 60% to get to phase 3.
Phase Three - Eagle Form
Once the boss has reached 60%, he will transform into an Eagle; at this point, wait for your tank to gain aggro before dealing damage to him. Two abilities can characterize this fight:
1.Tornadoes
2.Energy Storm
Tornadoes deal no damage but can cause massive CC to whoever the tornadoes are focused on; Look at the image below to see how you should deal with this phase:
Essentially you want your back against the wall and away from other players; if you don’t, you will soon learn that you are doing no damage and no one else can deal damage either.
Energy Storm, this is a simple thornmail type of damage - reflecting a small % of damage to the player as you do damage. Be careful not to kill yourself when low on HP; otherwise, it’s relatively simple to outplay.
Phase 4 - Lynx Phase
Two abilities again (seems to be a pattern). We will highlight these abilities and how to deal with them below:
1.Lynx Rush
2.Claw Rage
These abilities are randomized, so the healers need to be ready for a difficult phase. Lynx Rush causes Zul’jin to charge at a random raid member and deal 2000 damage to them; this can get deadly as the same member can be charged more than once.
Claw Rage is similar to Lynx Rush; Zul’jin charges at a random player in the raid and makes 12 consecutive attacks - at this point, all heals should be re-directed to this member. There are other methods of dealing with this, e.g., Bubble from pally, vanish from rogue, iceblock from the mage, and a few others; use these as often as you can.
Keep nuking him till he goes into the next phase.
Phase 5 - Dragonhawk Phase
The dragonhawk phase is the most tricky phase of the fight and requires killing Zul’jin fast. Players should stand in a circle to avoid flame breath that hits a random player, the same as the Akil’zon fight with the electricity. He makes a flaming whirlwind attack that hits the entire raid no matter where you stand, so healers will have to be topping everyone up as fast as possible.
During this phase, he will drop Sword of Fire patches on the ground, which will hurt anyone standing near it - move out of them as fast as you can!
You must defeat Zul’jin in this phase quickly because you will accumulate stacks of flame buff hit, which increases damage taken by his Flaming whirlwind attack.
And that’s it! Once you have defeated his last phase, you will be finished with Zul’aman.
Summary
Zul’aman is one of the most interesting designed raids in terms of locations, most raids will be indoors and have stuffy rooms, but this design suits the look of the Trolls. We hope this guide helped you out; you can check out more of our tailor-made TBC News and for our epic deals on character boosts and Cheap WoW Classic TBC Gold here. Always remember positioning is critical for this raid, so move and dodge everything you can; good luck, and as always, Happy Raiding!
Table of contents
Recommended Article