
- > Titan Reforged Server Population Surpasses 2.4 Million
- > Why Global WoW Players Are Flocking to Titan Reforged
- > Titan Reforged Time Server: Changes in Molten Core Rules – “No Rules” Brings Challenges for Casual Players
- > Titan Reforged World Boss Preview: Normal Players Can Participate and Earn P1 BiS Gear
- > Titan Reforged Tankadin's Direct BiS - Powerful Trinkets You Need: Anvil of the Titans and Flow of Knowledge
- > Titan Regorged Time Server - Pre-Raid Tasks for Molten Core, Earn a Level 213 Final Ring!
Ultimate Guide to MC in Titan Reforged: Clear It in One Go with a PUG! 25-Man Raid, No More Wiping
The Titan Reforged has introduced an exciting 80-level MC raid, and many returning veteran players have been caught off guard by the new mechanics. Whether you’re struggling with PUGs, wiping on trash mobs, or new players instantly dying and being kicked from the raid, it’s not about bad gameplay. The secret to clearing this 60-level raid with 80-level characters lies in understanding the new strategies! After thorough testing, we found that with an item level of 200+ and Fire Resistance potions, even a PUG can breeze through the raid. Here’s the ultimate guide that guarantees you won’t wipe and will clear the raid in one go!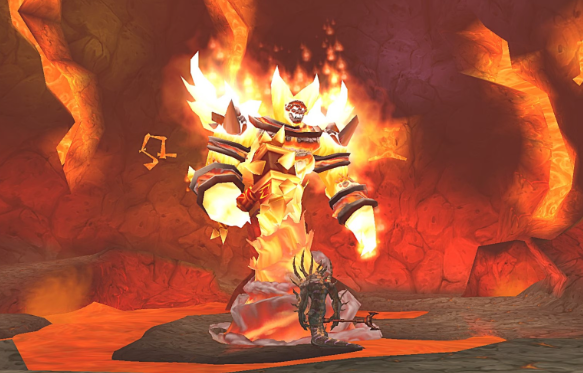
5-Minute Raid Prep: Essential Checklist for Quick Clears
Before diving into the raid, make sure your gear is ready. You don’t need to overgrind your item level—200+ is sufficient. The 5H dungeon set mixed with badge gear will do the trick. The key to success is Fire Resistance—tanks should aim for an item level of 210+, and Holy Paladins should buff the group to around 340+ Fire Resistance. DPS and healers can easily hit 200+ item level, and Dalaran offers convenient rings and necklaces that help reach the threshold.
Don’t skip on Fire Resistance potions—bring at least 10 per player. Engineers should make sure to have Rocket Boots for added speed, and everyone should carry an Drums of Speed for guaranteed success. Here’s the recommended raid composition:
-
2 Tanks (DK for boss and Paladin for AoE taunts)
-
5 Healers (Holy Paladins for tank healing, Priests and Shamans for group healing)
-
18 DPS (Prioritize Pain Affliction Warlocks and Unholy DKs for fast kills)
10 Boss Mechanics You Need to Know to Clear MC
Each boss in MC has unique mechanics, but with the right strategies, you’ll be able to clear them all efficiently. Here’s a breakdown of the key mechanics for each boss, along with strategies that guarantee success:
1. Lucifron: Dealing with AoE and Curse
Lucifron’s 35-yard AoE “Impending Doom” and “Lucifron's Curse” can devastate unprepared groups. The strategy is straightforward:
-
DK Tank pulls the boss to the wall.
-
Holy Paladin should manage the adds by keeping them away from the group.
-
DPS should prioritize adds first, then focus on Lucifron.
-
Priests need to quickly dispel the Lucifron's Curse and Impending Doom debuffs.
-
Mages should be on the lookout for curse removal.
Melee DPS should stay behind Lucifron to avoid cleave damage.
2. Magmadar: Panic and Frenzy Mechanics
Magmadar’s Panic and Frenzy mechanics are notorious for causing chaos.
-
Shamans place Tremor Totems under the tank to deal with the Panic mechanic.
-
Hunters use Tranquilizing Shot to prevent Magmadar from going into Frenzy.
-
Players targeted by Frenzy should immediately run out of the group.
-
Healers should prioritize healing those affected by Frenzy.
-
Avoid standing on lava pools as it will damage your group.
3. Gehennas: Shadow Bolt and Rain of Fire
Gehennas introduces “ Shadow Bolt” that stacks debuffs and can wipe unprepared groups.
-
Tanks position Gehennas against the wall, while ranged DPS should stand 25 yards away.
-
Imps need to be interrupted immediately, and Shadow Vulnerability should be dispelled.
-
Players hit by Rain of Fire should quickly run to open spaces to avoid blowing up the group.
4. Garr: Managing Adds and Explosion Risk
Garr summons 8 adds Firesworns, and they have to be controlled carefully.
-
Warlocks should banish 4 of the adds.
-
DK Tanks should keep Garr facing away from the group.
-
Holy Paladins should help control the adds by taunting them.
-
DPS focus on killing the marked adds first, then finish off Garr.
-
When Garr hits 50% HP, the adds will enrage, so focus all DPS on the boss.
5. Baron Geddon: Avoiding Explosive Damage
Baron Geddon’s Living Bomb mechanic tests positioning skills.
-
Everyone should spread out by at least 5 yards.
-
Players with Living Bomb should run to an open space.
-
If players don’t move fast enough, they will explode, wiping the group.
-
Priests should focus on removing the Burning Mana debuff to conserve mana.
-
When Infernois cast, melee DPS should move to the ranged zone to avoid damage.
6. Shazzrah: Magebane Shielding and Teleporting
Shazzrah’s Arcane Explosion and Blink mechanics are manageable at level 80.
-
Split ranged DPS into two groups based on where Shazzrah teleports.
-
Paladin should pick up aggro as soon as Shazzrah teleports.
-
Mages and Priests should focus on dispelling curses, and stop all casting when Shazzrah activates his Magebane Shielding to avoid reflection damage.
7. Golmach: Avoiding Fire DoTs
Golmach applies a fire DoT that can kill anyone who doesn’t avoid it.
-
Main tank holds Golmach, and the off-tank takes care of the dogs.
-
Melee DPS should stop attacking once they hit 5 stacks of the fire DoT and wait for it to expire.
-
Healers should focus on players targeted by Pyroblast.
8. Sulfuron Harbinger: Interrupting Healing Adds
Sulfuron Harbinger has adds that heal themselves, requiring precise interrupts.
-
Main tank positions the boss to the left, and the off-tank handles the adds.
-
Melee DPS focus on interrupting the adds’ healing.
-
Healers must keep the tank’s health high as Sulfuron deals massive damage.
9. Majordomo: Magic Reflection and Healing
The Majordomo Executus’s adds come with Magic Reflection.
-
Mages and Warlocks need to be careful when attacking the adds due to their Reflective Magic Shields.
-
Priests should focus on healing while keeping an eye on the reflection shield.
-
DPS should kill the adds before focusing on the boss.
10. Ragnaros: Phase 1 and Phase 2 Mechanics
No need to extinguish fire in this encounter—just focus on the kill!
-
Phase 1: Everyone should spread out, and melee DPS should run when Ragnaros casts Wrath of Ragnaros.
-
Phase 2: Ragnaros submerges, summoning adds. Warlocks should banish Firewalkers and ranged DPS should avoid mana-draining mobs.
-
Once Ragnaros hits 30% HP, activate Bloodlust and go for the kill.
PUG Survival Tips: How to Avoid Pitfalls
When forming a PUG, the system will divide gear into three categories. Don’t mix T1 sets across categories, as it can cause confusion. Orange Hammer and Orange Necklace are 219 ilvl upgrades and should be prioritized.
-
If a player dies, don’t panic—battle rezzes are unlimited in the 80-level version.
-
Always synchronize the five Core Hounds and kill them at the same time to avoid wipes.
-
When dealing with Molten Giants, split them into two waves to minimize healer stress.
-
The Lava Surgershould be pulled together and AOE’d quickly to avoid delays.
Conclusion:
With this comprehensive guide, you’re now prepared to tackle MC in the WoW Time Server without worrying about wipes. Focus on the strategies, ensure your Fire Resistance is up, and use these tips to clear the raid in one go.
Interested in WoW Classic Titan Reforged but having difficulty getting an account? We highly recommend checking out our comprehensive resource: Complete Guide on How to Play WoW Classic Titan Reforged.
If these tips resonate with you, make sure to bookmark SSEgold for ongoing deep dives into Titan Reforged. Visit our WoW Classic Titan Reforged Shop to find the perfect pre-made account to skip the grind, Titan Reforged gold to gear up instantly, boosting services for those tough bosses, and much more – your fast-track to raiding glory.
SSEgold Now Offers:
-
Top-up One-Month Subscription
-
Level 80 Account Customize
-
Level 80 Death Knight Account
-
Level 80 Mage Account
-
Level 80 Warlock Account
Table of contents
Buy WoW Classic Titan Reforged Products
Recommended Article