
- > TBC Anniversary Phase 2 Gold Guide: Best Materials to Stockpile for Massive Profit
- > TBC Anniversary Phase 2 Attunement Guide: How to Get SSC & TK Attuned Fast
- > TBC Anniversary Phase 2 Pre-Raid BiS List for Every Class
- > TBC Anniversary Phase 2 Preparation Guide: Everything You Need to Do Now
- > TBC Anniversary Phase 2 Meta Changes: Biggest Winners & Losers
- > TBC Anniversary Secret Vendors & Hidden Rewards Guide – Loot, Mounts, and Profit Tips
Karazhan Boss Strategies – Complete TBC Anniversary Encounter Tactics

Karazhan is the first major stepping stone of TBC Anniversary raid progression, featuring a lineup of twelve boss encounters (eleven core + Nightbane optional) with mechanics that test group coordination, positioning, interrupts, and target priority.
Before diving into strategy, it’s worth ensuring your raid has the resources it needs. Buying TBC Anniversary gold early at SSEgold can cover food buffs, potions, and enchants — all of which make a measurable difference in boss fights. And if your raid wants consistent clears and loot without week-to-week stumbling, a Karazhan boosting service can accelerate your progress and learning curve.
Also read our Karazhan TBC Anniversary Raid Guide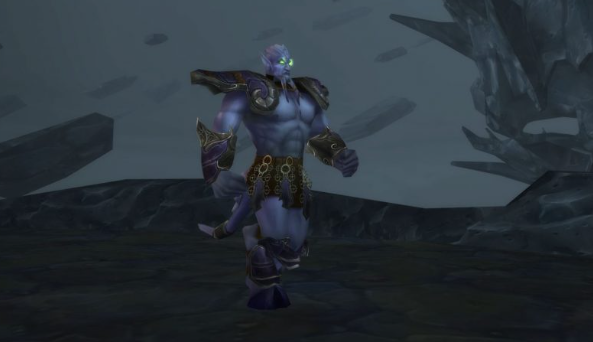
Attumen the Huntsman Strategy
Mechanics & Setup
Attumen is essentially a three-phase fight:
-
Phase 1 – Midnight Only: Main Tank holds Midnight; DPS burns.
-
Phase 2 – Attumen Spawns (~95%): Split tanks on each boss, positioning them facing away from the raid to avoid Shadow Cleave.
-
Phase 3 – Combined (~25%): Bosses merge — stack melee behind and dispel Intangible Presence quickly.
Tactics
-
Hunters should use Misdirection at phase transitions.
-
Warriors can Spell Reflect during Intangible Presence windows; Disarm Attumen to reduce melee cleave damage.
-
Stack ranged behind the boss in Phase 3 to minimize Berserker Charge risk.
Moroes – Handle Adds Like a Pro
This fight revolves around add control. Moroes summons four of six possible adds with varying abilities (healers, mana burners, stunners).
Strategy Highlights
-
Call a kill order before the pull (Healers → Mana Burners → Stunners → Moroes).
-
Crowd Control (CC) stray targets to prevent healers from going crazy.
-
Off-tank should hold second threat for when Moroes Gouges the main tank.
-
Interrupt Mana Burn and Greater Heal on the healer adds.
Suggested CC tools:
-
Hunter Freezing Trap
-
Priest Shackle Undead
-
Paladin Turn Evil
Maiden of Virtue – Position & Dispel
A simpler fight on mechanics but punishes mistakes.
What You Need to Do:
-
Spread ranged and healers to avoid Holy Wrath chain damage.
-
Instantly dispel Holy Fire on allies — this damage stacks and can overwhelm healers.
-
Before Repentance, move into her Holy Ground to break the stun early.
Key interrupts and immunities (e.g., Ice Block) can mitigate dangerous spells if timed right.
Opera Event – Adapt to the Script
There are three possible Opera encounters:
Big Bad Wolf
-
Kite the target (typically one raid member),
-
Heal while kite target avoids melee damage.
Wizard of Oz
-
Kill order is crucial: Dorothee → Roar → Strawman → Tinhead.
-
CC Strawman with stuns, and kite Tinhead after stacking Rust debuffs.
Romulo & Julianne
-
Interrupt Julianne’s heals and dispel her Devotion.
-
Tanks position Romulo near walls for easier handling.
-
Phase 3: Kill both within 10 seconds of each other to prevent res.
Nightbane – Optional but Rewarding
Nightbane cycles between ground and air phases at 75/50/25%:
-
Ground: Tank against a wall; avoid Smoldering Breath and Tail Sweep.
-
Air: Stack under him for skeleton waves (Rain of Bones), heal up Smoking Blast, and avoid ground hazards.
Fears and debuffs like Distracting Ash must be dispelling priority.
The Curator – Flare Management
This encounter alternates between Flare phases and burn windows:
-
Flares spawn every ~10 seconds — kill them quickly before chain damage spirals.
-
After the 10th flare, the Evocation phase begins: Curator takes 3× damage, so save cooldowns for this window.
-
Ranged should spread out to avoid flare chain damage.
Warlocks applying Curse of Doom so it lands during Evocation is a classic tactic to maximize DPS.
Terestian Illhoof – Handling Sacrifice & Adds
Illhoof presents two key focuses:
-
Kil’rek (adds with Broken Pact buffs)
-
Chains of Sacrifice (kill chains fast and heal the targeted player).
Tactics:
-
Kill Kil’rek first to reduce Illhoof’s defenses.
-
DPS focus chains immediately after Sacrifice.
-
Healers must be ready to top up the sacred target quickly.
Shade of Aran – Reaction & Interrupt
Shade is a spellcaster with no threat table — anyone can grab aggro.
Fight Cues:
-
Spread by 10+ yards to avoid counters.
-
Interrupt Frostbolt/Fireball at the end of casts.
-
Avoid Flame Wreath, move out of Blizzard, and escape Magnetic Pull zones.
-
At ~40%, kill or CC Water Elementals quickly.
Netherspite – Beam Rotation
This dragon alternates between:
Portal Phase:
-
Assign beam soak roles — Red, Blue, Green — based on buff/debuff needs.
-
Avoid void zones and rotate cleanly at set stack thresholds.
Banish Phase: -
Run to the back of the room.
-
Tanks re-establish aggro when Netherspite lands.
Clear rotation and communication prevents unnecessary deaths and ensures consistent phase transitions.
Chess Event – Simple Priorities
-
Push pawns out of the way first.
-
Focus bishops (healers) before the queen and king.
-
Always avoid fire hazards on the board.
Switching controlled pieces mid-fight can help adapt to threats and finish faster.
Prince Malchezaar – Multi-Phase Cleanup
This final core boss demands tight movement and positioning:
Phase 1:
-
Tank near a wall to minimize Shadow Nova and infernal pop risk.
-
Dispel Shadow Word: Pain and slow inference spawns.
Phase 2 (60%):
-
Heavy tank damage — cooldowns matter here.
Phase 3 (30%):
-
Adds axes and faster infernal spawns require space awareness. Maintain positioning to avoid unnecessary knocks or damage.
Conclusion – Practice Makes Perfect
Karazhan rewards precision and planning. Each boss tests your raid’s ability to adapt — whether it’s interrupt timing, positioning, or quick target swaps. For groups struggling with week-to-week improvements, consider securing more in-game resources — Go to SSEGold and buy TBC Anniversary gold — and even use a Karazhan boosting service to experience smooth, satisfying clears and consistent loot. With coordination and strategy, Karazhan can become your raid night highlight.
Table of contents
Buy WOW TBC Classic Anniversary Products
Recommended Article