
- > Fish It Pirate Event Update Guide: All New Fish, Secrets, Quests & Event Pass Explained
- > Diamond Rod Fish It: The Ultimate Endgame Rod and How to Get it
- > Fish It Christmas Event Part 2 Guide – New Quests, Train Wheels, Christmas Cave & Secret Fish
- > How to Find All 4 Train Wheels in Fish It (Roblox) – 2025 Christmas Event Guide
- > How to Get the Fluorescent Rod in Roblox Fish It (Full Guide & Is It Worth It?)
- > How to Catch the Panther Eel Secret Fish in Fish It
The Ultimate “Fish It” Traveling Merchant Guide
If you’re playing Fish It, then you’ll want to be very familiar with the roaming merchant known as the Traveling Merchant. This guide will walk you through how the merchant works, what items rotate in his stock, and how to plan your coin (gold) spending around his appearances. Whether you’re a new angler or a seasoned veteran, this “Fish It merchant guide” will help you maximise value and avoid impulse buys in the “Fish It merchant update” era.
Looking for a shortcut to top-tier Fish It gear? Check out SSEGold for rods, baits, and totems to get ahead!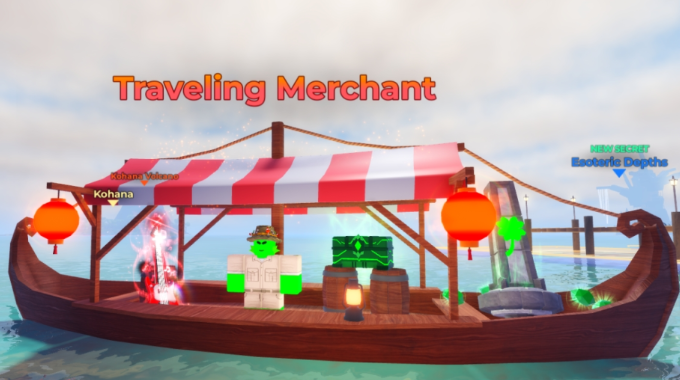
How the Traveling Merchant Works
Location & Schedule
-
The Traveling Merchant appears on Fisherman Island — specifically near the Spinner/Wheel zone, in a small red‑and‑white striped boat.
-
His stock refreshes approximately every 12 hours, meaning you’ll want to visit at least twice a day to check new items.
-
Additionally, there may be a paid option (via Robux) to force a restock earlier if you’re desperate for a particular item. (Want cheap Robux? Check SSEGold.)
Interaction & Mechanics
-
When you dock at the spot, you’ll interact with the merchant’s menu to view what’s currently for sale.
-
Because the stock rotates, you’ll see different categories of items (rods, baits, totems, skins) at different times.
-
Items are purchased with in‑game gold (or sometimes via microtransactions for cosmetic crates). So you’ll need to accumulate sufficient gold and plan ahead.
Why This Is Important
-
The merchant offers limited‑time inventory that often includes higher‑tier gear, buffs or cosmetic items. Missing a good deal means waiting for the next rotation.
-
Efficient use of gold here can accelerate your progress — e.g., getting a high‑luck rod or a buffed bait might unlock tougher catches sooner.
-
Conversely, poor spending decisions (buying mediocre items impulsively) can waste your gold and delay your progress.
What Items Rotate & What to Look For
Here’s a breakdown of the typical item categories you’ll find, and examples from recent updates.
1. Fishing Rods
These are some of the most important items the merchant offers — good rods can significantly increase your luck, speed and maximum weight (which helps catch heavier fish). Examples:
-
The Fluorescent Rod: Legendary rarity, Luck ~300 %, Speed ~23 %, Max Weight ~160 KG. Price ~68 k gold (varies).
-
The Hazmat Rod: Legendary rarity, Luck ~380 %, Speed ~32 %, Max Weight ~300 KG; price over 1 million gold.
What to prioritise:
-
If you’re still early‑game, get the best rod you can afford when it appears.
-
Look at rod stats: luck boost is key, speed helps, max weight matters for heavier catches.
-
If you already have a top‑tier rod, you may skip rods and look elsewhere.
2. Baits / Bobbers
These items improve your chances of rare catches, mutations, or improve luck. Examples:
-
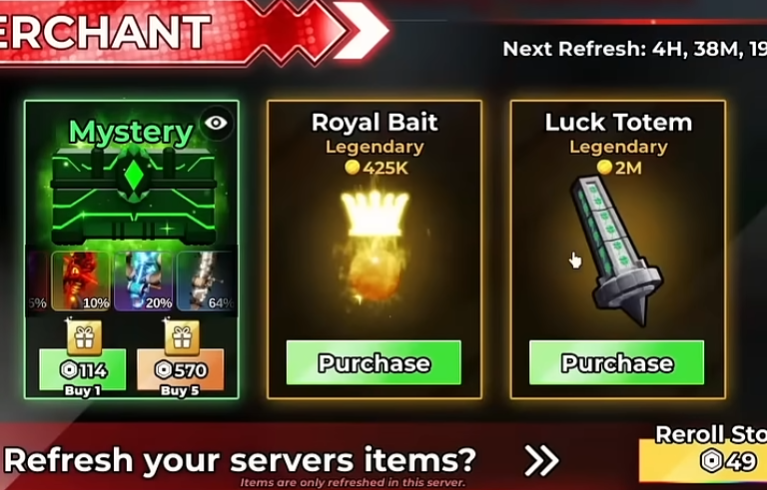
Royal Bait: Legendary, +130 % Luck and +30 % chance for Gold Mutation, price ~425k gold.
-
Singularity Bait: Mythic rarity, +380 % Luck, price ~8.2 million gold.
What to prioritise:
-
If you’re stuck catching the same fish and rare mutations are eluding you, bait is a smart investment.
-
The huge cost of top‑tier bait (e.g., 8 million) means you should plan ahead; don’t buy mid‑tier baits willy‑nilly.
3. Totems & Server‑Wide Buff Items
Some items affect your server or area and benefit you (and others) temporarily. Example:
-
Luck Totem: Legendary; price ~2 million gold; effect: server‑wide luck boost.
What to prioritise:
-
Use when you and your friends/teammates will be fishing together — the buff will pay back faster.
-
If you play solo, weigh the benefit vs the cost.
4. Cosmetic Items / Skin Crates
These are optional and mainly aesthetic. Example:
-
Skin Crate: Costs Robux (premium currency) and doesn’t affect gameplay.
What to prioritise:
-
Only buy if you have extra currency and you value appearance over performance.
-
Don’t let cosmetics distract you from progression‑oriented spending.
How to Plan Your Coin Spending — Smart Strategy
Here are practical steps and tips to build a spending plan around the merchant’s rotation.
Step 1: Set a Gold Savings Target
-
Look at what you currently have, and what high‑tier items you might want (e.g., Hazmat Rod at ~1 M+ gold, Singularity Bait at ~8 M).
-
Decide your next target milestone (for example: “Save 2 M gold by next merchant restock”).
-
Every time you see the merchant, check the best rod and the best bait. If one appears and you have saved, strike.
Step 2: Prioritise Based on Stage of Game
-
Early Game: Your best value is rods that boost your fundamental stats. Skip ultra expensive baits/totems unless you’ve hit a plateau.
-
Mid Game: You have a decent rod; now baits and totems start bringing more value (esp. for rare/mutation hunting).
-
Late Game: High‑end baits, totems, and rare rods or upgrades become worth your gold; also maybe spend on skins if you’re done with performance upgrades.
Step 3: Resist Impulse Purchases
-
If you see a “decent” item but it’s not significantly better than your current gear, wait for the next rotation.
-
Ask: “Will this purchase speed up my gameplay significantly?” If the answer is no, hold off.
Step 4: Monitor Rotation and Restock Timing
-
Because the merchant restocks ~every 12 hours, check regularly — missing a good deal means waiting.
-
Set reminders if needed: check once in the morning, once in the evening.
-
If you have generous currency and want a specific item now, you could use the forced‑restock option (if available), but weigh the cost.
Step 5: Track Your ROI (Return on Investment)
-
After purchasing a high‑tier item, track your results: how much more gold are you earning, how much rarer catches are you getting?
-
If the item doesn’t deliver noticeable improvement, shift focus in next cycles (maybe invest in a different category).
Step 6: Keep Some Gold in Reserve
-
Don’t spend everything at once — keep a buffer (e.g., 10‑20% of your gold) in case a rare stocking appears unexpectedly.
-
Some rotations may include rare items at lower cost: being ready means you can pounce.
Don't have enough? Check SSEGold for coins and other items.
Example Spending Timeline
| Timeframe | Goal | Example Action |
|---|---|---|
| Weeks 1‑2 | Build base gear | On first merchant visits, buy the best rod under ~100k gold. |
| Weeks 3‑4 | Upgrade | Save up ~500k‑1M gold. When merchant offers a rod like Hazmat, buy it. |
| Weeks 5‑8 | Buff & mutation focus | Save 2 M+ gold. When merchant offers Luck Totem or Royal/Singularity Bait, consider purchase. |
| Weeks 9+ | Late game & cosmetics | With solid rod & bait, you can sometimes pick up skins or ultra‑rare gear when presented. Keep buffer in case of rare drop. |
Final Thoughts & Update‑Specific Notes
-
The latest “merchant update” to Fish It emphasises stock rotation every 12 hours and the presence of high‑tier items like the Hazmat Rod and high‑end bait.
-
Stay active: check the merchant regularly, and don’t let a week go by without visiting or you might miss a great offer.
-
Value combos: a high‑luck rod + a strong bait often beats only buying one or the other. Synergies matter.
-
Be patient: sometimes the best stock doesn’t appear until you’ve saved up — this patience pays off in gameplay speed and rare catch chances.
With this “Fish It merchant guide” in your arsenal, you’ll be well‑prepared to capitalise on the Traveling Merchant’s offerings and spend your gold wisely. Tight lines — and happy fishing!
Table of contents
Buy Fish It Products
Recommended Article