
- > ARC Raiders PvE Mode Explained: Loot Changes, Restrictions & Full Guide
- > ARC Raiders Weekly Update September 1-8: Rust Belt Trials, Rewards & More
- > ARC Raiders Subway Skin Guide: How to Unlock the Subterranean Outfit?
- > ARC Raiders Frozen Trail Update Guide: New Map, Features and Changes
- > Arc Raiders Expedition 4 Requirements: Caravan Stage 5 Breakdown & Fast Farming Guide
- > Where to Find the Survivor Augment Blueprint in ARC Raiders (2026 Complete Guide)
How to Farm 100K+ Damage in ARC Raiders Flying ARC Fireworks Trial
The ARC Raiders Flying ARC Fireworks has quickly become one of the most useful strategies for players trying to maximize their Weekly Trial scores. The Flying ARC challenge looks strange at first because you are not using traditional weapons to deal damage. Instead, you need to use Fireworks Boxes, smart positioning, and enemy control to squeeze out as many damage points as possible.
If you are still building your inventory or need extra resources for your runs, some players choose to buy cheap ARC Raiders Coins from SSEGold to speed up their preparation and get the items they need faster. However, the real key to this challenge is not simply having more supplies. It is knowing how to set up the encounter correctly.
After testing different approaches, the most reliable method is using Spaceport, controlling Flying ARC movement with Barricades, and maximizing Fireworks damage while enemies are trapped in a predictable position. A well-executed run can easily push beyond 60K points, with 100K+ damage scores being a realistic goal.
Best Loadout for the ARC Raiders Flying ARC Fireworks Trial
Before jumping into the raid, make sure your loadout is built around survival and repeated Fireworks usage. This trial is not about killing enemies quickly. It is about creating the perfect situation where your Fireworks Boxes can continuously damage Flying ARC targets.
A recommended setup includes:
- 10 or more Fireworks Boxes
- Barricade Kits
- Snitchcan Scanners
- Lure Grenades
- Healing items
- Shield Rechargers
- A reliable precision weapon
The Fireworks Boxes are obviously the most important item because they are the only tool that directly increases your trial score. The rest of your equipment exists to keep enemies controlled and allow you enough time to complete the damage cycle.
For weapons, bring something accurate enough to disable Flying ARC components. You do not need a high damage build. You simply need a weapon that can consistently destroy two rotors and force the ARC to land safely.
Why Spaceport Is the Best Map for Flying ARC Damage
When it comes to the ARC Raiders Flying ARC Fireworks Guide, map selection makes a huge difference. Spaceport is currently the preferred location because it offers large open areas, clear visibility, and plenty of space for Flying ARC enemies to appear.
The launch tower area is especially useful because the surrounding structures help limit enemy movement. Instead of fighting Flying ARC across a wide open field, you can create a controlled area where the enemy stays close to your Fireworks.
The goal is simple:
Find a medium-sized Flying ARC such as a Hornet or Firefly.
Damage two rotors so it falls to the ground.
Move to the correct distance.
Set up your Barricade and Fireworks.
Repeat the process.
The entire strategy depends on controlling the battlefield rather than rushing.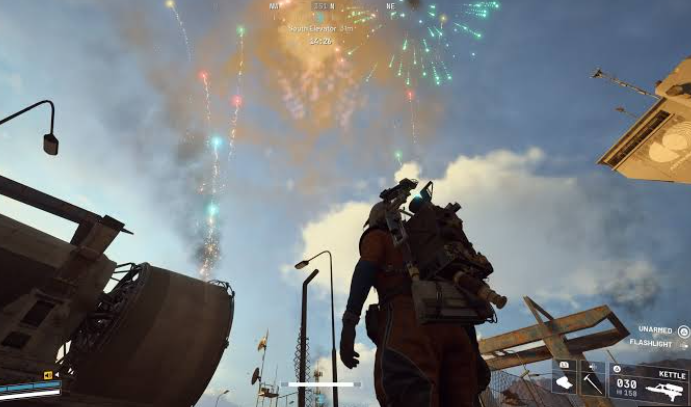
How to Use Barricades Correctly
Many players underestimate Barricade placement during this trial. The Barricade is not mainly there to protect you. Its real purpose is to create a predictable damage angle.
After grounding the Flying ARC, place your Barricade facing the enemy. Keep enough distance between yourself and the ARC, usually around 10 meters.
Then attach your Fireworks Box to the Barricade, slightly below the center area and facing the target.
This positioning helps the Fireworks launch directly toward the Flying ARC instead of wasting explosions in the wrong direction.
One common mistake is placing the Barricade too close or blocking the enemy completely. When that happens, the ARC may attack the Barricade instead of staying inside your damage zone.
Good positioning is more important than simply carrying extra Fireworks.
How to Ground Flying ARC Without Destroying It
The hardest part of this Weekly Trial is not using Fireworks. It is preparing the target.
Flying ARC enemies can explode if they crash from too high, which means you need to carefully disable them.
The safest method is:
- Find a medium Flying ARC in Spaceport.
- Let it approach you.
- Shoot two rotors on the same side.
- Allow it to fall naturally.
- Wait until it lands before placing your equipment.
Destroying two rotors on the same side usually creates a more controlled fall. If the ARC crashes too violently, you may lose your target and have to search for another one.
Once the Flying ARC is safely grounded, the rest of the process becomes much easier.
One Firework Box vs Two Firework Boxes
One of the biggest discoveries from high-score runs is that Firework placement matters more than the number of boxes you bring.
A single Fireworks Box can deal solid damage, but it may miss parts of the ARC depending on your angle.
Using two Fireworks Boxes can increase coverage because both explosions can hit different areas of the target. This becomes especially valuable when pushing for higher scores.
However, do not randomly place multiple Fireworks Boxes together. The best results come from testing different angles and finding where the Fireworks consistently connect.
Remember, the objective is not destroying the ARC quickly. The objective is maximizing damage points.
How Snitchcan Scanners Help Increase Your Score
Snitchcan Scanners are another useful tool for players attempting higher scores.
They help maintain enemy pressure and can provide additional opportunities when your first setup does not produce enough damage.
The important thing is timing.
Do not waste all your scanners immediately. Use them when you need another enemy or when you want to extend the farming window.
A patient player will usually outperform someone who simply throws every item at once.
Common Mistakes That Lower Your Score
Many players fail this challenge because they focus too much on speed.
Here are some mistakes to avoid:
Using Fireworks before the ARC is properly positioned.
Destroying the ARC too quickly.
Placing Barricades incorrectly.
Standing too close and getting overwhelmed.
Ignoring shields and healing.
Trying to stay too long for a few extra points.
A successful run is not only about damage. Extraction matters too. Losing everything because of greed is one of the easiest ways to waste a good attempt.
How to Reach 100K+ Damage Points
The path toward a 100K score is mostly about improving efficiency.
Follow these steps:
- Choose Spaceport as your map.
- Prepare plenty of Fireworks Boxes.
- Find a medium Flying ARC.
- Disable two rotors and safely ground it.
- Create a Barricade setup.
- Place Fireworks carefully.
- Repeat the process with multiple targets.
- Extract safely when resources are low.
A score around 60K already proves the method works, but experienced players can push much higher by improving Firework placement and reducing wasted damage.
The ARC Raiders Flying ARC Fireworks Guide is not about having the strongest weapons or the most expensive gear. It is about understanding enemy behavior, controlling the environment, and making every Fireworks Box count.
Once you master the setup, this Weekly Trial becomes much easier and can become one of the most rewarding challenges in ARC Raiders.
Table of contents
Buy ARC Raiders Products
Recommended Article