
- > AION 2 Arcana Cards Explained: Best Farming Methods, Rarity & Tips
- > AION 2 Sorcerer Build Guide 2026: Best Hellfire PvE and PvP Setup
- > Aion 2 Gladiator Guide: Skills, Best Builds, Stats and PvE/PvP Tips
- > Aion 2 Ranger Guide 2026: Best Skills, PvE Build & Stigma Setup
- > Aion 2 Elyos vs Asmodian: Which Faction Fits Your Playstyle?
- > Aion 2 Chanter Guide: Best Skills, Builds, PvE & PvP Tips
AION 2 Ludra Raid Guide: Requirements, Boss Mechanics & Rewards
The AION 2 Ludra Raid is one of the most challenging endgame activities in the global version. Officially called Abyssal Forge: Ludra, this 10-player Sanctuary raid returned on November 4, 2026, with Normal and Hard difficulties, updated boss mechanics, and valuable equipment rewards. Whether you are preparing for your first clear or trying to improve your Hard Mode performance, understanding the encounter is essential.
Preparing for Ludra also means improving your gear, skills, and overall character progression. SSEGold provides AION 2 Kinah, along with guides covering different classes and progression strategies. However, keep in mind that NCSoft has warned that unauthorized third-party Kinah purchases can result in account suspension or termination. Always review the official rules before considering external currency services.
What Is the AION 2 Ludra Raid?
Abyssal Forge: Ludra is a 10-player Sanctuary raid that requires two groups of five players. The encounter begins with the Central Abyss Fusion Reactor, followed by separate routes involving Isolation Specialist Rahu and Abyssal Wings Ketu. Both groups eventually reunite to fight the final boss, Eternal Ludra.
Ludra was available during Early Access but was removed when the global version launched on October 5. NCSoft brought it back on November 4 with new and adjusted mechanics, making older raid guides useful references rather than complete instructions for the current encounter.
Ludra Raid Requirements
| Requirement | Normal Mode | Hard Mode |
|---|---|---|
| Minimum Item Level | 2,800 | 3,000 |
| Party Size | 10 players | 10 players |
| Time Limit | 1 hour | 1 hour |
| Difficulty | Standard | Advanced |
Both difficulties offer the same general categories of equipment rewards, although their drop rates vary. Normal Mode is a reasonable starting point for groups learning the encounter, while Hard Mode is designed for highly developed characters with better coordination.
Meeting the minimum item level only allows you to enter. It does not guarantee a successful clear.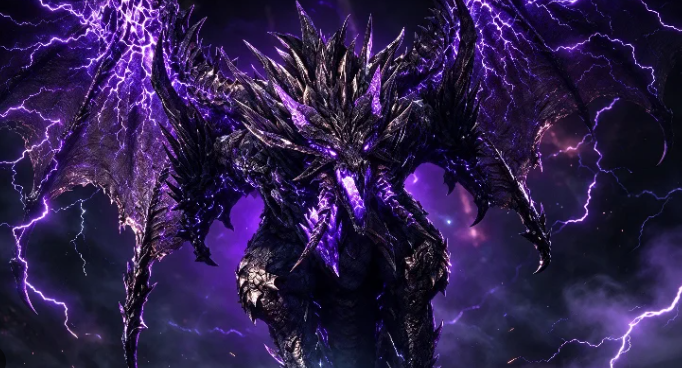
AION 2 Ludra Raid Walkthrough and Boss Mechanics
The raid has four main sections. Each tests a different part of your team's coordination, from handling additional objectives to surviving dangerous boss attacks.
One important note: several detailed mechanics below come from Early Access combat recordings and community-observed global encounters. NCSoft has confirmed that the global version includes changes, so exact timings and some attack patterns may differ.
1. Central Abyss Fusion Reactor
The Central Abyss Fusion Reactor is the opening encounter.
Players must deal with continuous enemy spawns while attacking the main reactor. Auxiliary reactors can also appear on the upper level, temporarily increasing the main reactor's durability.
The basic strategy is:
-
Assign one or two players to handle auxiliary reactors when they appear.
-
Use the updrafts to reach the upper platforms.
-
Destroy the additional reactors before returning to the main target.
-
Keep the remaining players focused on the main reactor and spawned enemies.
The auxiliary reactors are optional objectives, but ignoring them can significantly increase the time needed to finish this section.
2. Isolation Specialist Rahu
Rahu is one of the two encounters handled during the raid split. His fight focuses heavily on positioning and transferring dangerous effects between players.
One of the most important mechanics in the earlier encounter is the purple circle or bomb-pass mechanic.
A targeted player must transfer the effect to another teammate before the timer expires. If the transfer fails, a dangerous purple puddle remains on the ground. Multiple failed transfers can eventually wipe the group.
Other attacks to watch for include:
-
Cross and Plus Attacks: Watch the floor indicators and move out of the marked areas.
-
Safe Cone: When most of the arena becomes dangerous, move behind Rahu into the designated safe area.
-
Red Line: The targeted player should lead the attack away from teammates.
-
Red Donut: Coordinate positioning and jump over the expanding ring when required.
The most common mistake is allowing players to handle the bomb mechanic without a clear assignment. Decide who receives the effect next before the fight begins.
3. Abyssal Wings Ketu
Ketu is the other major encounter during the raid split. This fight places more emphasis on movement, target handling, and defensive timing.
The earlier version included several mechanics that players should recognize:
-
Laser Attacks: Watch the attack direction and move into the safe area.
-
Spirit Enemies: Assign ranged damage dealers to eliminate spirits before they reach their destination.
-
Red and Blue Eyes: Pay attention to the color indicators and follow the correct positioning instructions.
-
Falling Orbs: Use the required movement or jump timing to handle incoming orbs.
-
Soul Stones: These provide temporary protection during a dangerous attack sequence.
The Soul Stone phase deserves special attention. In the earlier strategy, the Cleric's survival was particularly important because the class could use its resurrection abilities to recover the group after the dangerous mechanic.
Ranger players can also be useful when dealing with distant spirit enemies.
For players preparing for this encounter, the AION 2 Ranger Build Guide provides additional information about ranged damage, positioning, and skill priorities.
4. Eternal Ludra
Eternal Ludra is the final boss and the most demanding part of the raid. All ten players must work together to survive his attacks.
The encounter includes several mechanics that require precise positioning.
Orb Mechanics
Ludra summons red and blue orbs. In the earlier encounter, an assigned player had to handle the red orb using an appropriate defensive stance, while other players dealt with the blue orbs.
Do not rush toward the orbs without checking the incoming attack pattern. Tornado attacks can appear during the same sequence.
Bingo Board
The Bingo Board is one of the best-known Ludra mechanics.
A grid appears on the arena floor, and players must place their marked areas on different tiles to reveal the safe location. Once the blue safe tile appears, the entire group must move into it before the countdown ends.
The previous encounter featured this mechanic around 50% and 25% boss health.
Red and Blue Tethers
Players receive different color indicators and must separate into their assigned groups. Players with different colors standing too close together can become connected by dangerous tethers.
Agree on the group's left and right positioning before the encounter begins.
Final Color Circles
Near the end of the earlier encounter, players had to enter circles matching their assigned colors shortly before the attack resolved. Entering too early could cause the protection to expire before the damage landed.
The key to beating Eternal Ludra is preparation. Assign the red-orb player, agree on color positioning, and make sure everyone understands the Bingo Board before starting.
AION 2 Ludra Raid Rewards
The Ludra Raid offers several important endgame rewards, including weapons, accessories, wings, and collectible items.
| Reward | Important Details |
|---|---|
| Ludra's Weapon and Guard | New equipment rewards |
| Ludra's Bracelet | Can be Amplified to Level 5 |
| Abyssal Bracelet | Can be Amplified to Level 3 |
| Sealed Abyssal Waves Wings | Special wing reward |
| Artwork: Abyssal Ludra | Collectible artwork |
Normal and Hard Mode offer the same general reward categories, but their drop rates differ. The Abyssal Bracelet can drop from either difficulty.
How to Get Ludra's Bracelet
Ludra's Bracelet is particularly interesting because players can work toward it through Gear Change Vouchers rather than relying entirely on random drops.
According to the November 4 patch notes, the exchange requirements are:
| Voucher Type | Required Amount |
|---|---|
| Normal Ludra Voucher | 6 |
| Hard Ludra Voucher | 3 |
| Normal to Hard Conversion | 2:1 |
Players can select the corresponding Gear Change Voucher as a guaranteed reward from Normal or Hard Mode. Two Normal vouchers can also be converted into one Hard voucher.
This creates a more predictable progression path for players who want to obtain Ludra's Bracelet and eventually amplify it to Level 5.
Ludra Hunt Event and Exclusive Titles
The Ludra Hunt event runs from November 4 until maintenance on November 24, 2026, in PST. European players have until November 25 in CET.
The first 20 Hard Mode parties in each region can earn exclusive titles based on their clear ranking.
| Ranking | Exclusive Title |
|---|---|
| First Party | The First to Slay Ludra |
| Second to Fifth Parties | Ludra's Conqueror |
| Sixth to Twentieth Parties | Ludra's Vanquisher |
| Other Normal or Hard Clears | Ludra's Nemesis |
The event covers Europe, North America East, North America West, South America, and Asia.
Players do not need to compete for the top rankings to receive an event title. Anyone who defeats Ludra in Normal or Hard Mode during the event period can earn Ludra's Nemesis.
Tips for Preparing for Your First Ludra Clear
Reaching the required item level is only the beginning. A successful raid also depends on your equipment, combat performance, and teamwork.
Here are a few practical preparation tips.
1. Improve Your Core Equipment
Check your weapon, armor, accessories, and enhancement levels. Accuracy is particularly important because missed attacks reduce your actual damage output.
2. Prepare Consumables
Bring enough healing and offensive consumables for a longer encounter. Make sure your character has the resources needed to maintain consistent combat performance.
3. Build a Balanced Team
A well-organized group should have suitable frontline protection, healing, support, and damage dealers. Cleric and Chanter players can provide valuable group support, while DPS classes need to maintain reliable damage throughout the fight.
If you play Sorcerer, check the AION 2 Sorcerer Build Guide for PvE skill priorities and damage rotation advice.
4. Assign Important Mechanics
Do not wait until the boss starts casting to decide who handles dangerous mechanics. Assign bomb transfers, red-orb responsibilities, and color groups before entering the encounter.
5. Manage Your Progression Resources
Equipment upgrades and character development require consistent investment. Keep track of your available Kinah and upgrade materials, and prioritize the equipment that improves your overall raid performance.
Table of contents
Buy AION 2 Products
Recommended Article